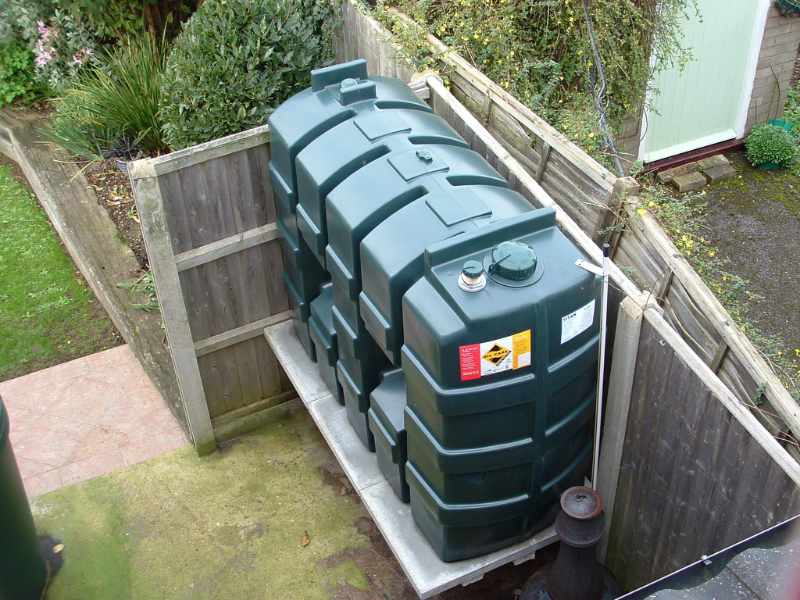
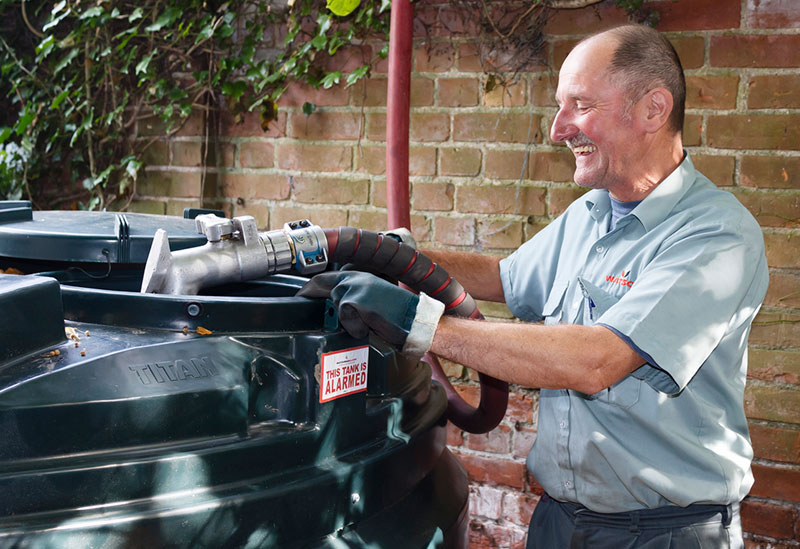
Oil Tank Installation and Replacement
Our OFTEC accredited oil heating engineers will work hard on your behalf to ensure that we find the oil tank best suited to you and your home.
Add Heat install and replace oil tanks for every size of property in Stockport, Macclesfield, Wilmslow & Cheshire.

What is involved in the replacement of my old oil tank?
Oil tank installation and replacement are two of our specialities, ensuring your home is kept warm with plenty of hot water. Our expert and friendly team will be able to professionally install your first oil tank or replace an existing one.
The work involved in the replacement of the oil tank at your property can be broken down into the following three categories: labour, materials and the cost of the replacement oil tank, however it can be broken down into a most detailed list of the activities and materials involved.
- Installation of the tank
- Monitor gauge for the oil
- Oil outlet
- Base work for the tank
- A fire screen (this will be dependent upon where the tank is to be located)
- Tiger loop (for tanks with a top outlet)
- A new line for the oil and a trench
It’s important to note that the location the tank is to be placed will be a major point in the complexity of the job and impact on the cost.

Dedicated, trusted tradesmen in the North West
Quality Workmanship
At Add Heat we pride ourselves on our high standard of work taking care of even the smallest detail to ensure you are 100% happy with your bathroom underfloor heating. Our reputation is what we have built our business upon and our attention to details is what keeps our customers happy.
Expert Advice
With over 25 years experience in the heating industry Add Heat are proud to be able to offer you expert advice and answer any of your underfloor and central heating questions. We have time served experienced tradesman to help you whenever you need us. With Add heat you know you are in safe hands.
Energy Saving
We are home energy savings experts and can provide you with expert advice on how to create and maintain a more energy efficient home or business.
Oil tank installation and replacement are two of our specialities, ensuring your home is kept warm with plenty of hot water. Our expert and friendly team will be able to professionally install your first oil tank or replace an existing one.
What is involved in the replacement of my old oil tank?
The work involved in the replacement of the oil tank at your property can be broken down into the following three categories: labour, materials and the cost of the replacement oil tank, however it can be broken down into a most detailed list of the activities and materials involved.
- Installation of the tank
- Monitor gauge for the oil
- Oil outlet
- Base work for the tank
- A fire screen (this will be dependent upon where the tank is to be located)
- Tiger loop (for tanks with a top outlet)
- A new line for the oil and a trench
It’s important to note that the location the tank is to be placed will be a major point in the complexity of the job and impact on the cost.
The materials involved for an Oil Tank installation
The amount of materials involved are largely impacted if you need a concrete base to be constructed for the tank. It is important to be aware that due to OTECs specific rules regarding the base a tank can rest on it is reasonably likely you will require a new base to be made.
An additional large aspect when it comes to the materials involved in an oil tank installation is the cost of a fire screen. The purpose of this so that you have a barrier between the installed tank and objects that are not fire rated. This can be required as the oil tank is not permitted within specified distances to objects that are non-fire rated. As you will appreciate a fire screen will add to the cost so if you have the space you may want to consider a location that is isolated for your tank.


The procedure for replacing an oil tank
The usual approach for the replacement of an oil tank is as follows:
-
Perform an assessment visit
Your oil tank installer will perform an assessment visit of the installation of the current tank. This will require access to the garden for them to carry out a risk assessment from an environmental perspective.
This also allows them to detail a solution that is in compliance with: the regulations for buildings, the regulations for storing oil, and the rules detailed by OFTEC.
-
Removing the old oil tank
After agreeing upon a solution, the installer will remove any oil from your existing tank before disconnecting it and removing it from your property.
-
Complete a pressure test
If the old connection pipe to your property is being re-used, the installer will complete a pressure test to ensure that the pipe is still fit-for-purpose.
-
Fit the new tank
A base will be built to house the replacement tank before completing the installation of the new tank.
Once the tank has been fitted, a connection pipe will be fitted to feed oil from the tank into your home.
-
Finishing up
The installer will bleed any leftover oil from the oil pipes before performing a test to make sure everything is working as expected.


We are OFTEC Registered
OFTEC is the Oil Fired Technical Association. They are recognised by the Government, oil companies, heating appliance and tank manufacturers as being the acceptable trade body in technician training & assessment for the domestic heating, oil distribution and commercial oil firing industry.
For the oil industry in England and Wales, OFTEC registered technicians are the only people defined as competent and able to self-certify their work without the need for informing the local building control department.
If you would like to find out more about OFTEC, you can call 01473 626298 or visit their website.
The Regulations for Oil Storage Installations
Your oil storage tank needs to be “Bunded” according to the ‘Oil Fired Technical Association’ (OFTEC) when the tank in question is:
- Located in
- Jersey
- Guernsey
- Isle of Man
- Installed with the boarders of Wales as of 15th March 2016
- Has an oil capacity is greater than 2500 Litres
- Is located within a 10-metre proximity of controlled water
- Is located in a position that a spill is capable of running into:
- An open drain
- A manhole cover that is loose fitting
- Is to be located within 50 metres of a borehole or spring
- Is located on a hard surface that would facilitate a spill to reach controlled water
- Is to be in a position that the vent pipe outlet will not be visible from the fill point of the tank
- Is to supply Oil to a building that is not a single-family dwelling
- Is located within a designated ‘Groundwater Source Protection Zone 1’ in England
- Can be affected by a Potential Hazard on the site
If the oil tank is to be located in an area that is at flood risk or is in a position that it is exposed to high winds, then a ‘Tank Restraint’ is needed. This restraint will stop the tank tipping and causing itself damage or having the potential to leak oil.
Questions about Oil Heating
If you’re looking for expert advice on oil heating or if you have any questions that haven’t been answered here, feel free to contact one of our advisors who would be happy to help.
-
The simple answer is yes! It is highly recommended that you have your boiler turned off when your residences oil tank is being filled. In addition, it is recommended that it is not turned on for 30 minutes post filling of the oil tank.
The reason for this approach is that you may have sediment in you tank and you don’t want to risk the sediment that is likely to get disturbed upon the tank being filled and getting pulled into the fuel line and then into your boiler.
-
The good news is the following two types of shower are compatible with a combination type boiler as they generate hot water at a pressure level that is the same as the mains:
- Thermostatically controlled shower
- Mains pressure balanced
However, if you are in the position that you are putting in a combination type boiler to replace a regular boiler and cylinder you will need to have an existing shower checked for suitability to the combination boiler. This is necessary as the existing shower could be of a pump assisted type and so is specifically designed for a system that runs on low pressure.
It is most advisable to always get advice from a qualified heating engineer to ensure you will not have issues with the shower selection for your residence.
-
The water main is a big consideration for your combination type boiler. This is because your properties water main must be of a size sufficient that it can at the same time:
- Deliver water to your boiler
- Run taps in the residence
- Flush toilets
- Run your washing machine
- Run your dish washer
If you get into the position that the water main is not of a sufficient size you could find the boiler being starved of water when a couple of water outlets (e.g. taps) are used at the same time. There is however a way to reduce the likelihood of this occurring. This is achieved by making sure the boiler has a priority greater than other outlets within the residence. This can be achieved by ensuring it is the first to pull from the mains water supply into the property.
As you will no doubt appreciate the capability/performance of a device that is fed from the mains means the device is very much dependent upon the mains supply being capable of giving the necessary level of:
- Flow rate
- Dynamic pressure
The reason for this is that the rate of flow from the mains must be capable to cover both cold and hot water supply at the same time. However, the flow rate is reliant on the incoming mains:
- Condition
- Size
- Type
It is imperative to understand that you must not mistake flow with pressure. In addition, the dynamic pressure level will be at a lower level than the static pressure from your supply.
To be complete on this aspect it is also possible that you may need a device to protect your system from too high a mains pressure. This device is called a ‘pressure reducing valve’. For your information the top level of incoming water pressure is usually at a 10 bar level.
-
When the heating of the water in the boiler takes place any calcium bi-carbonate that is dissolved in the water is changes into calcium carbonate. The presence of calcium carbonate in the water creates carbon dioxide and this shows in the water as many millions of tiny bubbles. Therefore what you observe as cloudy is in effect just a cosmetic effect as it will disappear as the water cools. This effect you will find is more prevalent in areas that have a hard water supply.
-
It is a good idea to make use of a water treatment in the central heating. This should take the form of an inhibitor. It is important to note that when this is used it is in alignment with the instructions from the manufacturers of the product. You should also be aware that it should be checked at a periodicity of 12 months or an even shorter time window if you have a loss of liquid from the system.
-
Two of the main causes are a pipeline leak or oil that is contaminated.
The cause of contamination could be:
- Water in the oil tank (can be caused by the tank cover being displaced)
- The tank being damaged as a result of condensation (rust)
- Sludge in the tank. This can be caused by:
- Micro organisms
- The interface of the water and the oil
If you need your tank to be flushed/cleaned or your oil line to be flushed then please ask your engineer for guidance.
-
It is not a problem to have artificially softened water in your heating system in order to reduce scaling in your system and so protect efficiency. This treatment can be applied by making use of the water softener bypass to fill or make a top up (if your boiler has this facility).